Electrofishing Job Guide
Overview
The Zero Desk Electrofishing (EFS) module streamlines your survey workflow by providing easy data entry while in the field, and professional report generation back in the office. This guide walks you through the complete job workflow.
Open Your Job
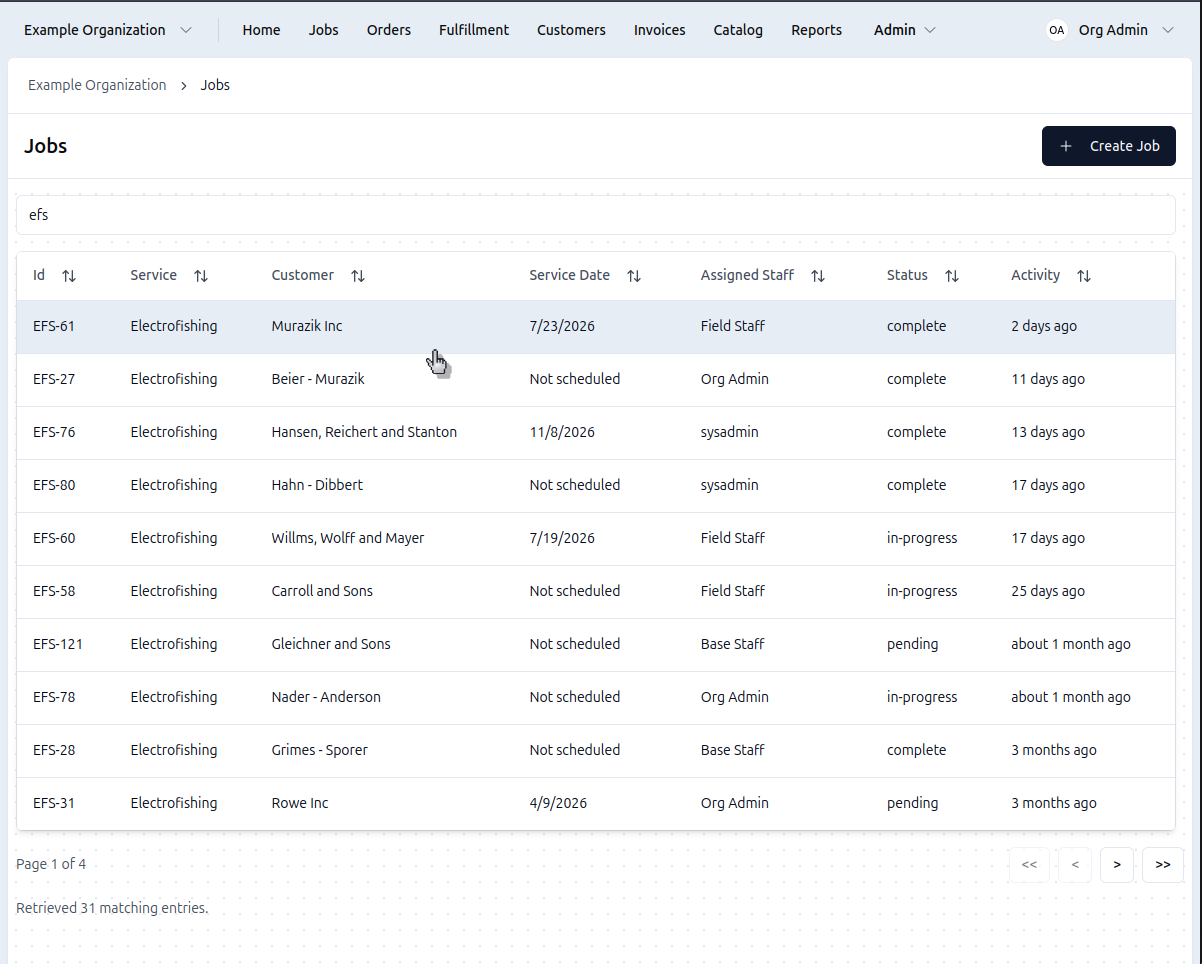
- Click Jobs in the navigation
- Find your job (like EFS-9)
- Click to View in the side sheet to open it
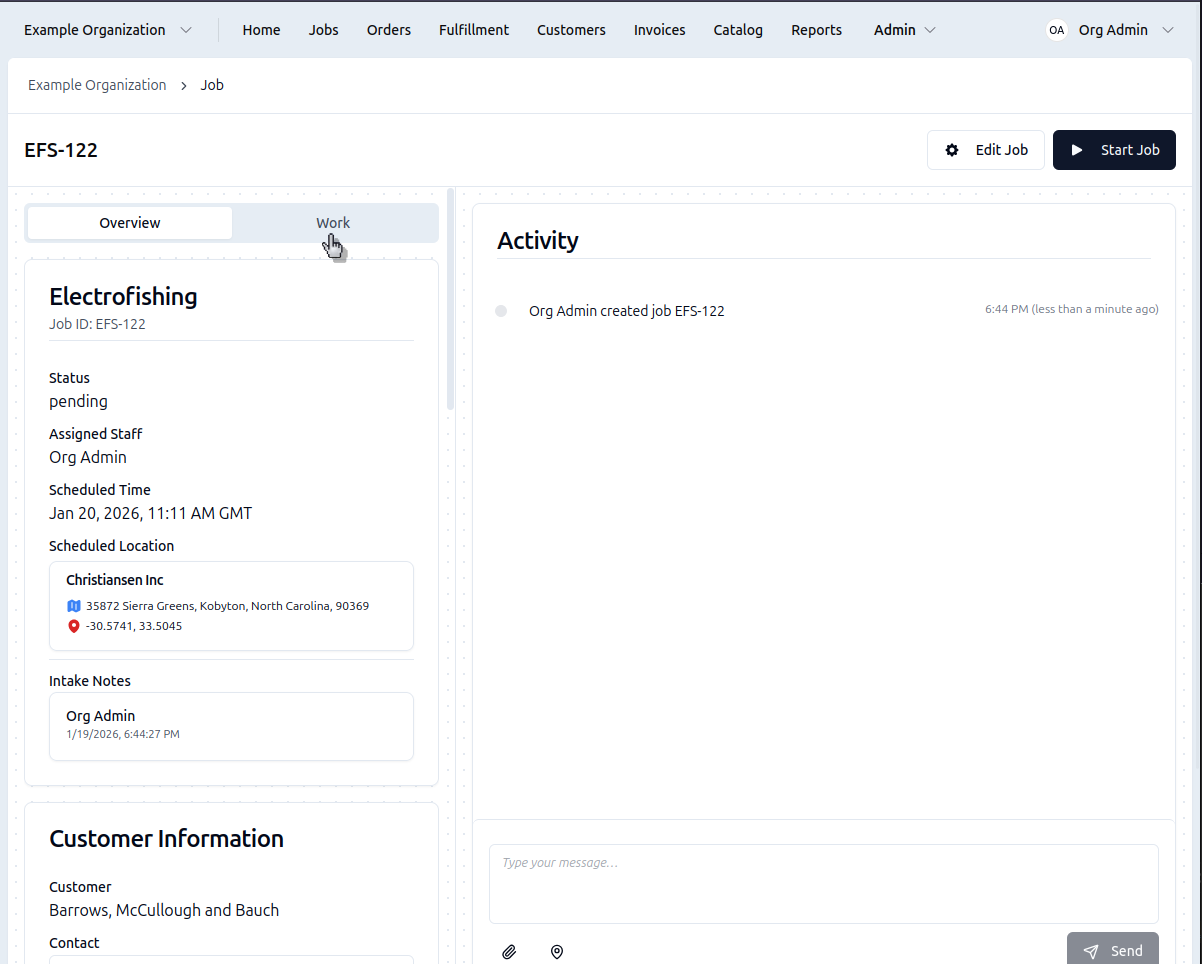
- Click the Start Job button
- Go to the Work Summary tab
You'll see cards for entering different types of data.

Work Summary Panel
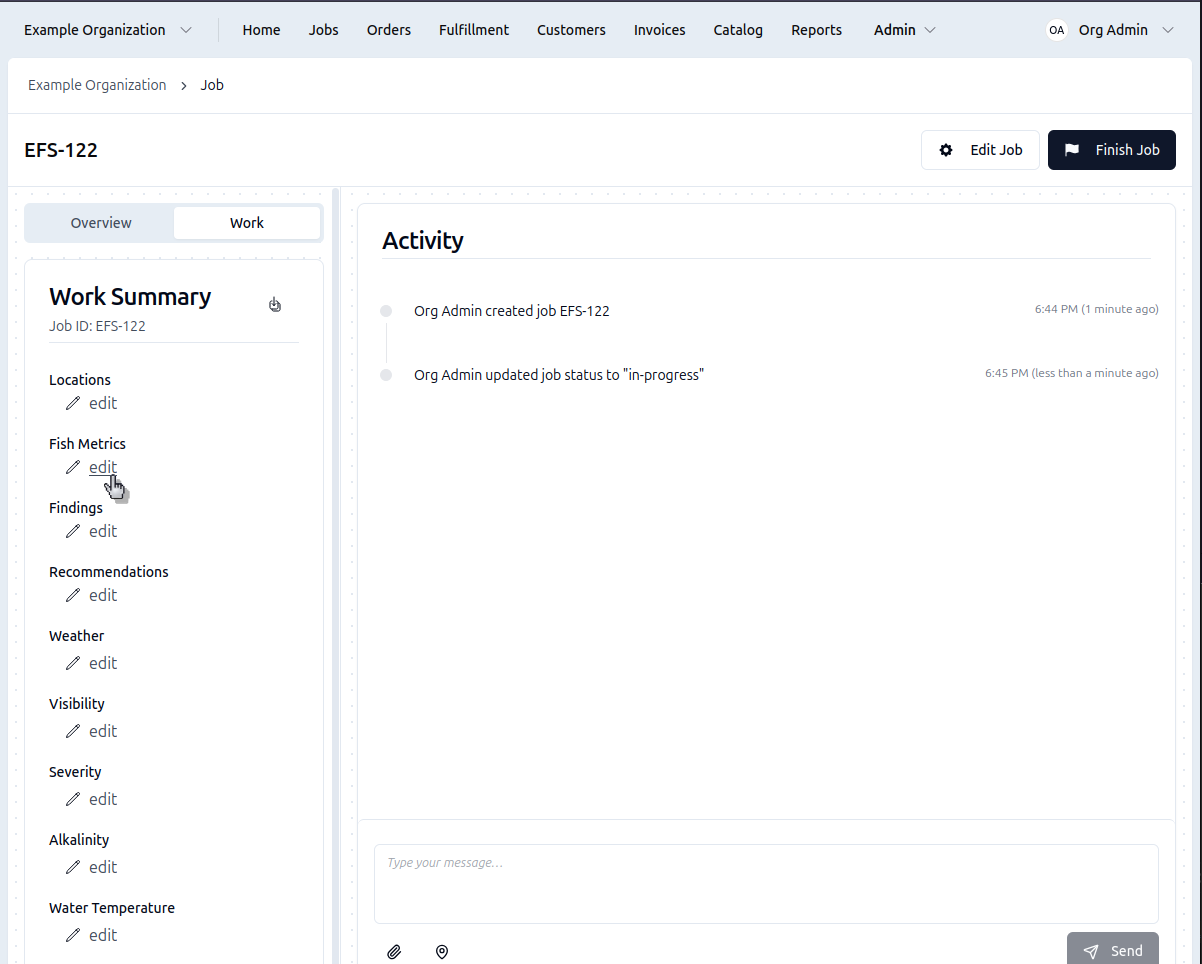
The work summary panel shows all the sections you can edit for this job:
- Fish Metrics
- Findings & Recommendations
- Weather
- Water Conditions (Visibility, Severity, Alkalinity, Temperature)
- Targets
Click any section to begin entering data.
Enter Fish Data
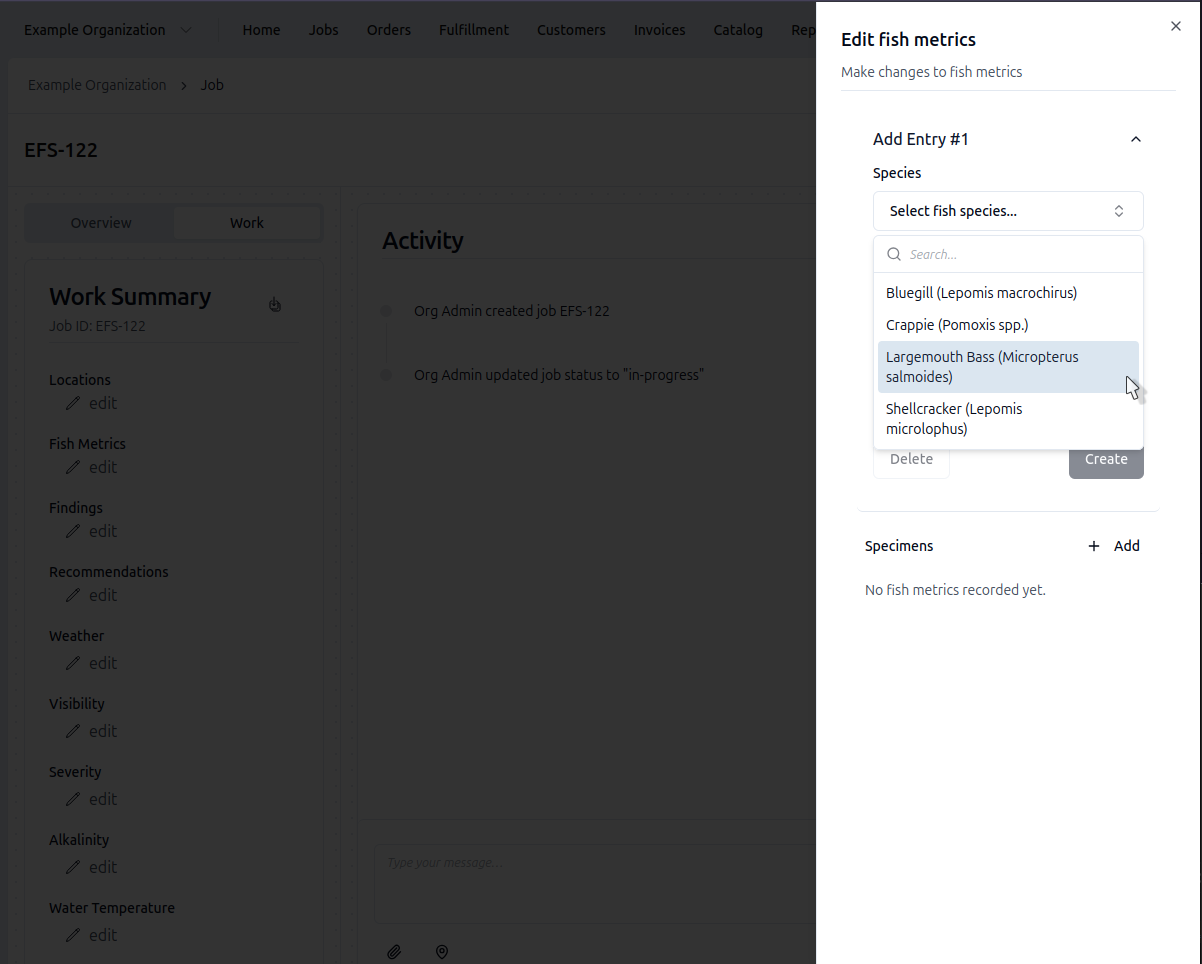
- Click Edit on the Fish Metrics card
- Select Species
- Enter Length (mm) and Weight (lb)
- Click the Create button
- Repeat for each fish
The form resets the length and weight after each entry, but not the species. This allows you to quickly log your next catch.
The fish metrics selector is optimized for keyboard entry. After entering each
field, hit TAB, to go to the next field. You can hit ENTER when you're on
the create button, and your cursor will be dropped back into the length field.
Add Findings
- Click Edit on the Findings/Recommendations card
- Search for observations (like "Insufficient structure")
- The finding you select will be added to the job
- Linked recommendations will appear automatically
- You can now add or remove individual recommendations
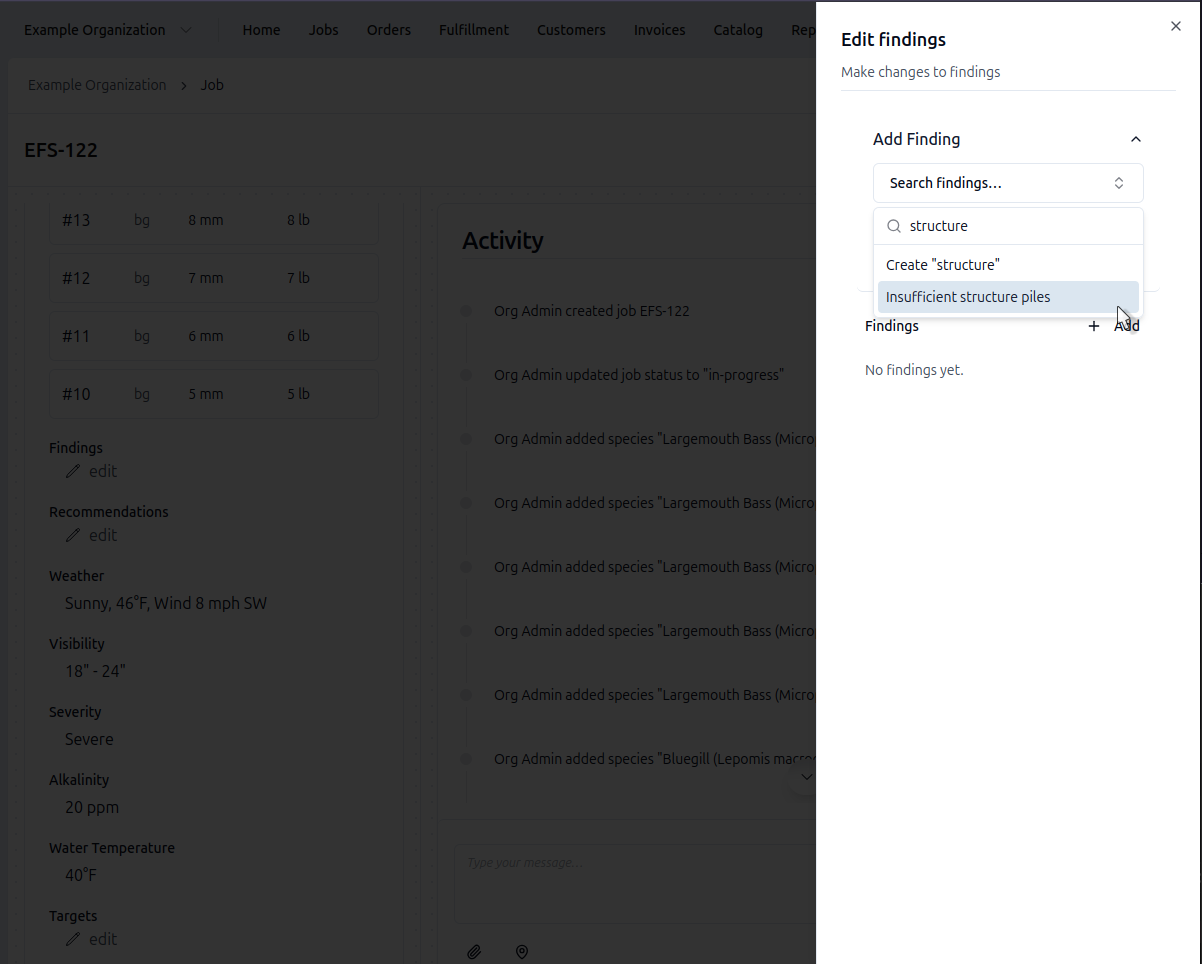
Findings can help you generate your electrofishing reports faster by pre-populating sets of recommendations. Both findings and recommendations can be used in report templates.
Record Weather & Conditions
- Weather
- Water Conditions
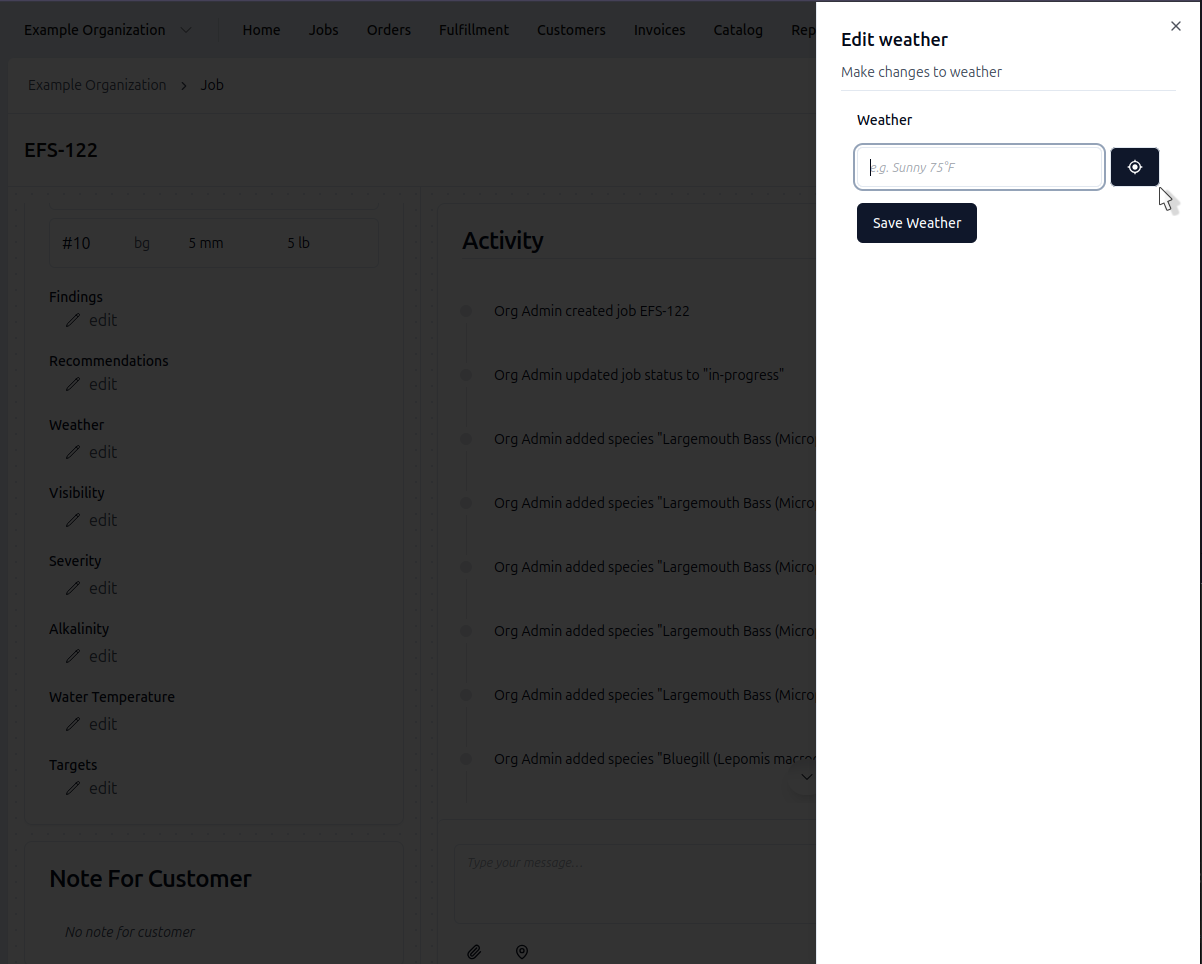
Fetch Weather
- Click Edit on the Weather/Conditions card
- Click Fetch Weather to auto-fill current conditions (online only)
- Grant location access when prompted
- Weather description populates automatically
- Or type weather manually if offline
- Click Save
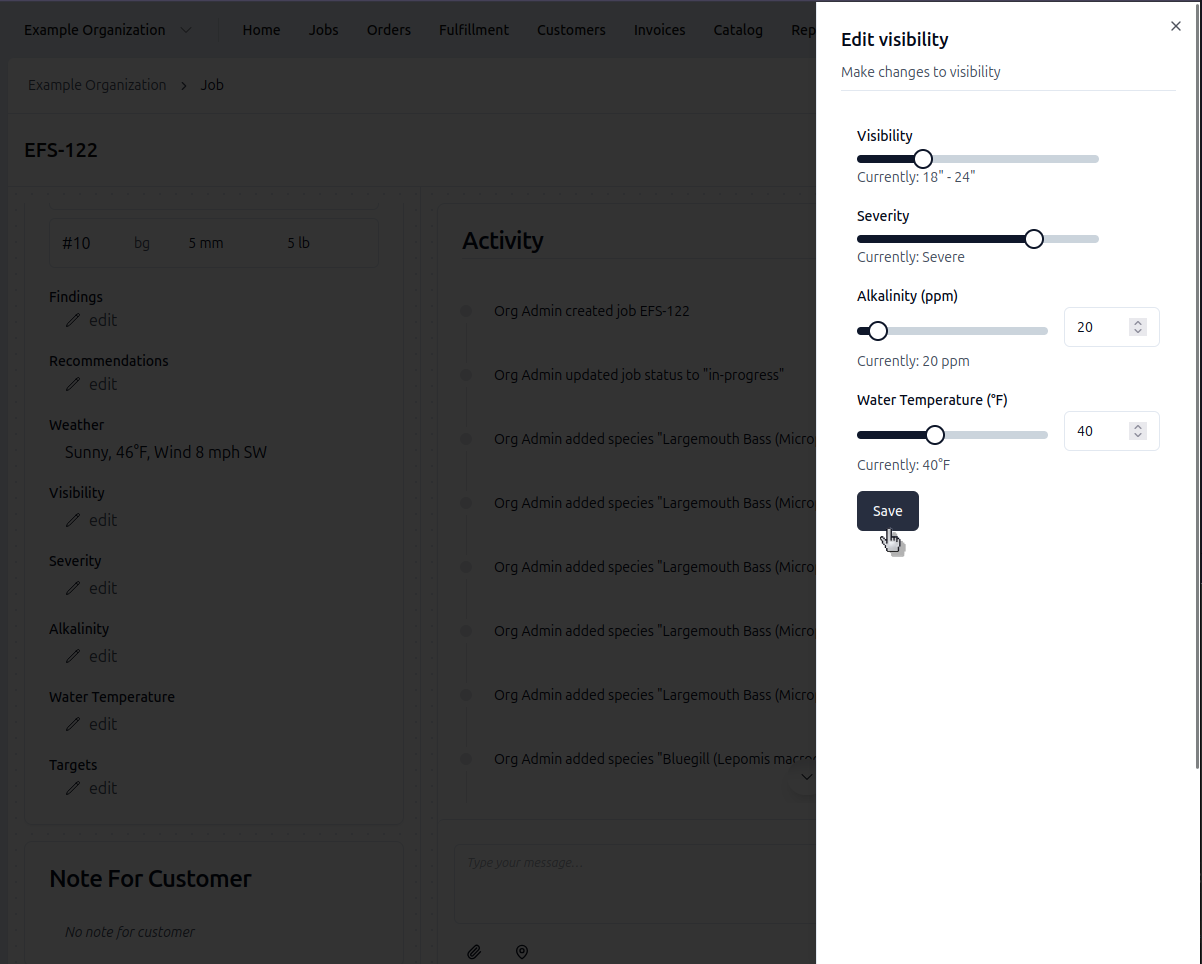
Water Quality Sliders
- Click Edit on the Weather/Conditions card
- Adjust sliders for water temperature, visibility, severity, alkalinity
- Click Save
The sliders show real-time value labels as you drag:
- Visibility - Ranges from < 6" to >72" in 6" increments
- Severity - Very Mild, Mild, Moderate, Severe, Very Severe
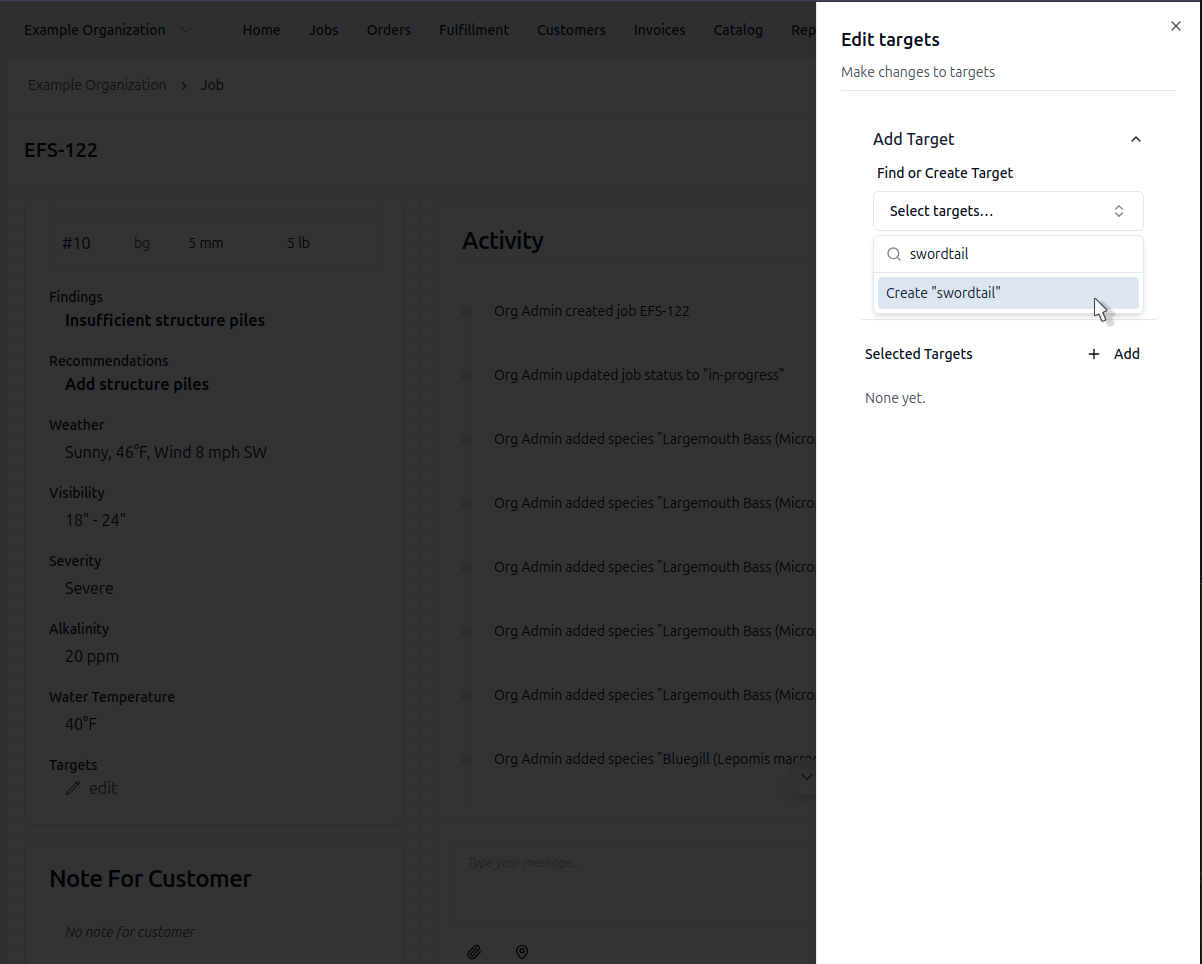
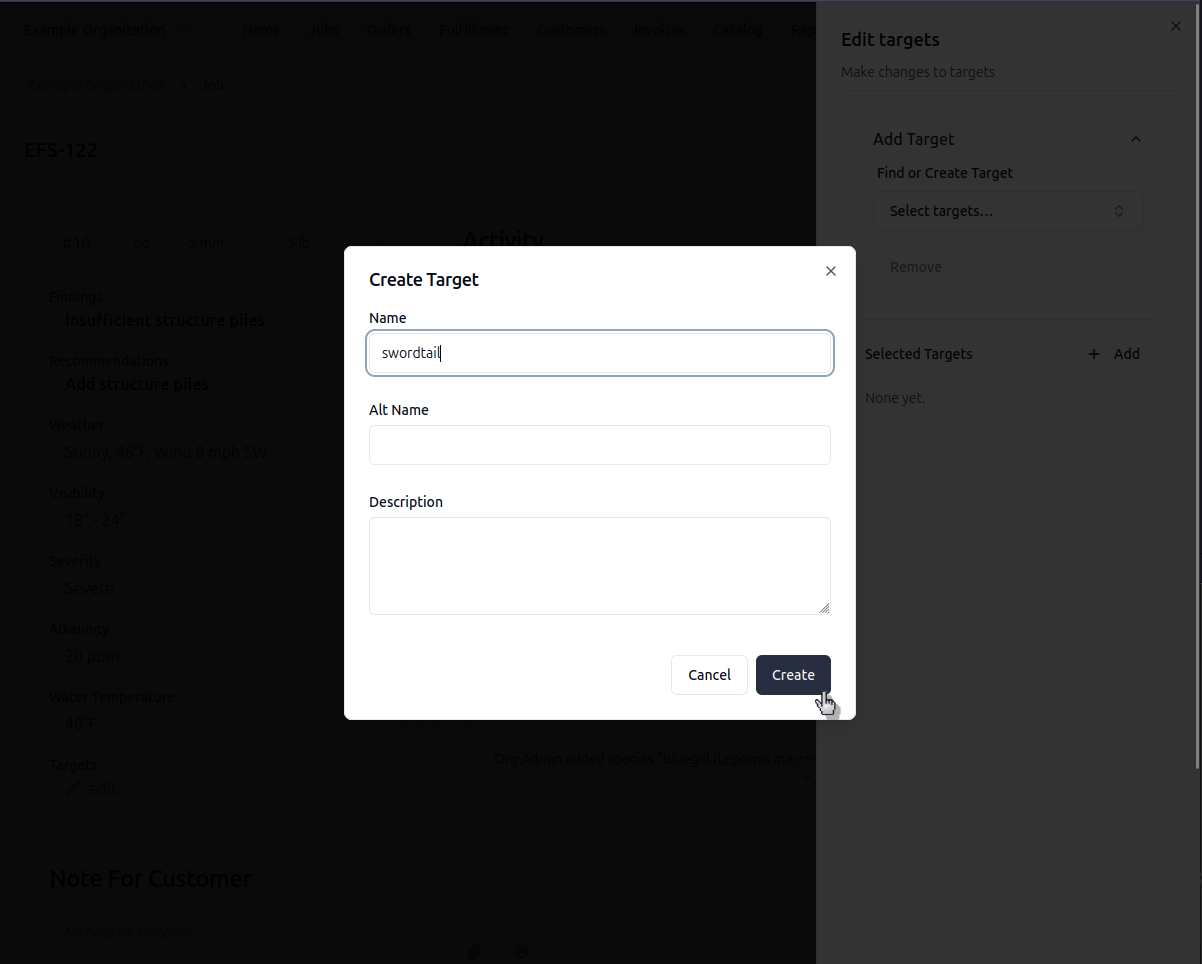
Add Targets
- Click Edit on the Targets card
- Search the catalog for target species (e.g., "Swordtail" or "Torpedo Grass")
- Click the Add button
- Or use the "Create ..." option to add a new target
- Click Save
Finish the Job
- Click Summary on the Fish Metrics card to review counts
- Verify all data cards are filled
- Click the Finish Job button
Your data is now ready for report generation.
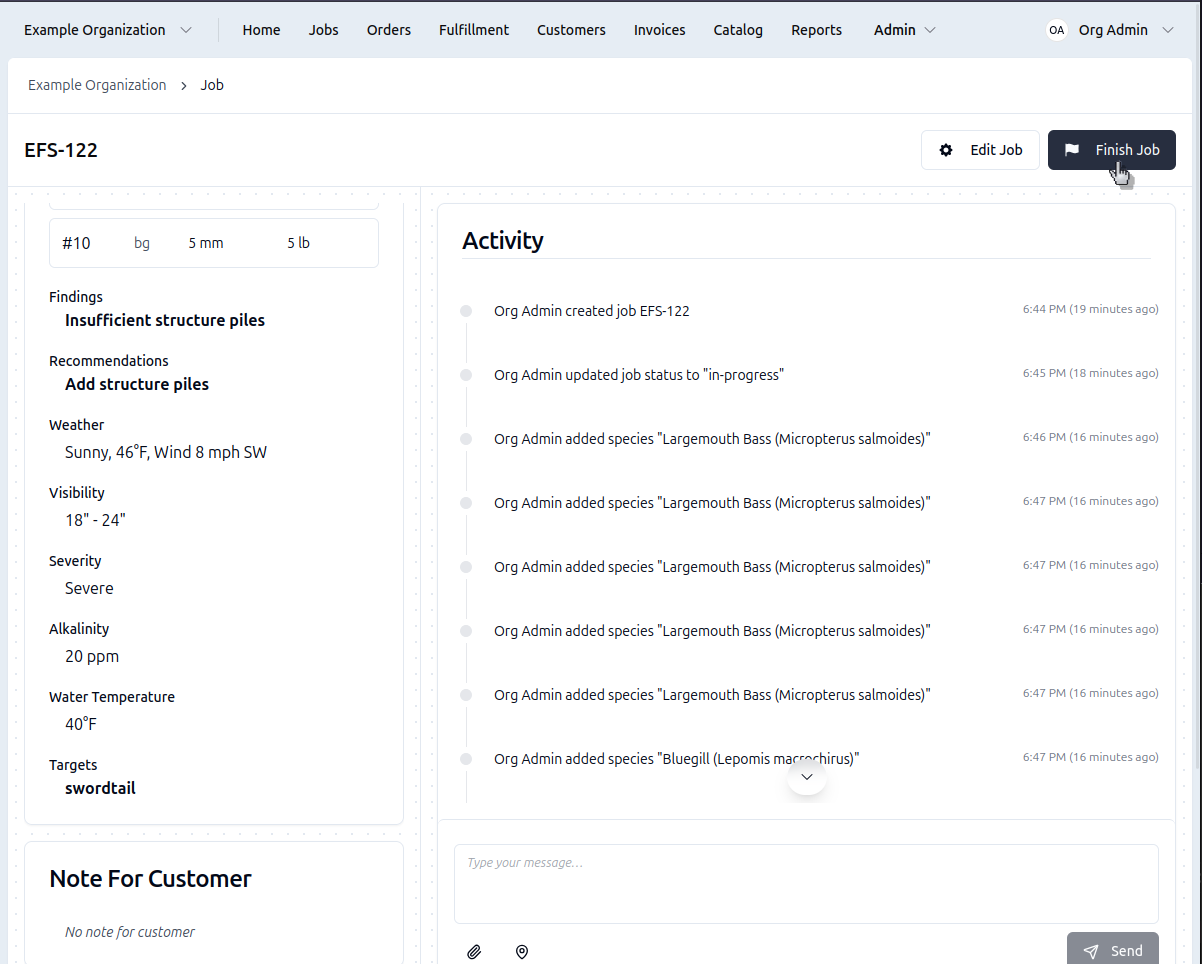
Once a job is finished, you'll see a "Generate Report" button on the work tab.
Quick Report Creation
After finishing a job, you can create a report directly from the job's work panel:
- Click the Work tab on the job
- Click Create Report
- The report will be automatically linked to this job

Detailed Guides
Fish Data Entry
The Fish Metrics Selector Sheet is where you'll enter most of your field data.
- Individual Fish
- Summary Stats
- Species Catalog
Using the Fish Metrics Selector Sheet
- Click Edit on the Fish Metrics card
- The selector sheet slides over from the side
- Use the Species Dropdown (supports type-to-search)
- Enter Length (mm) and Weight (lb)
- Click Add or press Ctrl+Enter
Entry numbers auto-increment, and L/W ratio calculates automatically. The form resets for the next fish.
To edit an existing entry: Click it in the bottom list. The form switches to "Edit Mode" with Update/Delete buttons.
Viewing the Summary Dialog
Click Summary on the Fish Metrics card to open a read-only dialog showing:
- Aggregated table: Min/Avg/Max length and weight by species
- Searchable specimen list: All individual fish entries with pagination

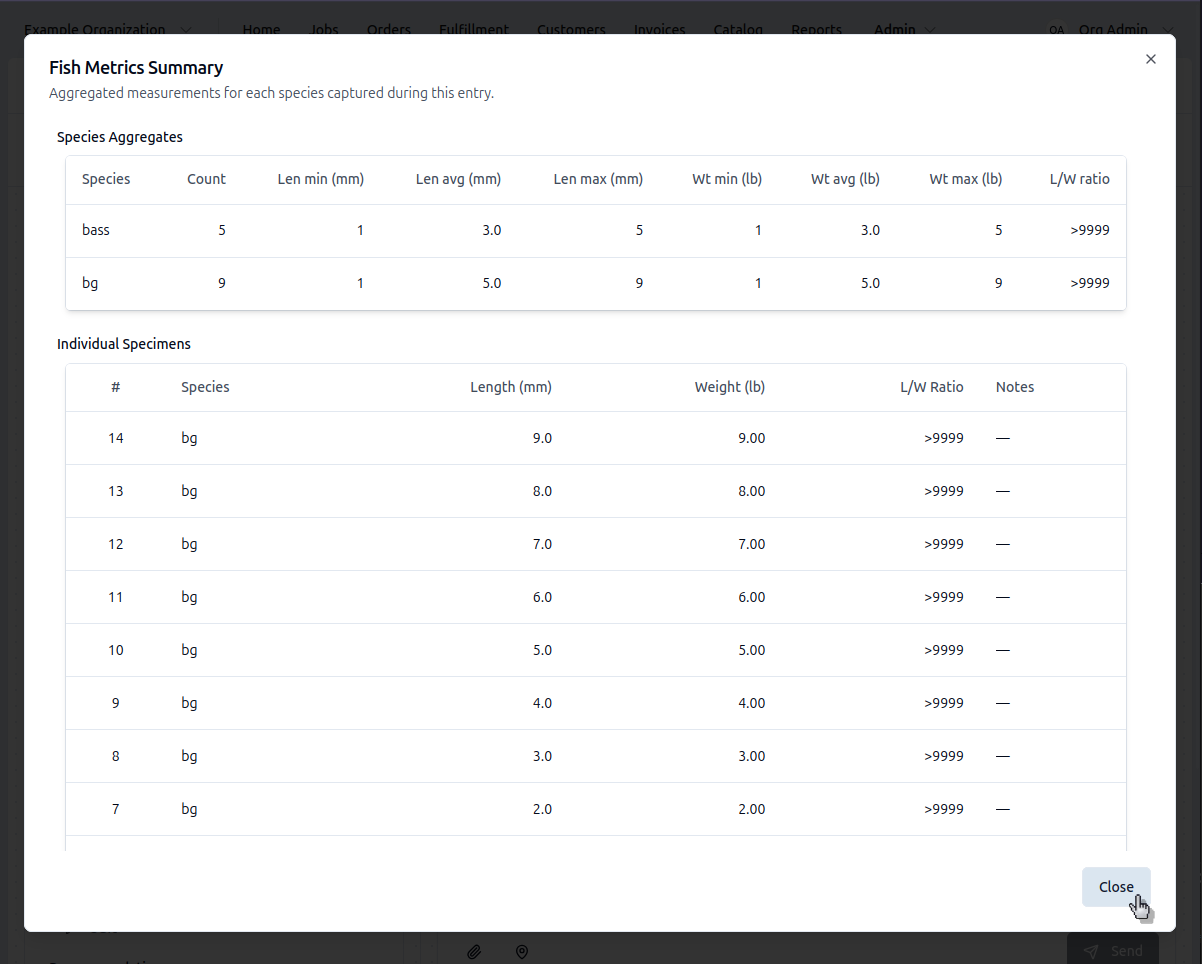
Use the summary dialog to verify counts, spot outliers, or do a quick field assessment. Click Close to return to Work Summary.
Species Catalog
The species dropdown is populated from your organization's catalog.
If you need a species that isn't listed:
- Contact your administrator to add it to the catalog
- Or select the closest available species and add a note in the Activity tab
Admins can manage the master species list in
Catalog → Species.
Recording Environmental Data
- 🌤️ Weather
- 💧 Water Conditions
- 📍 Locations
Weather Selector Sheet
- Click Edit on the Weather/Conditions card
- Click Fetch Weather button (requires internet connection)
- Grant location access when prompted
- Weather description populates automatically
- Or type weather manually if offline or GPS isn't available
- Click Save Weather
Water Conditions Selector Sheet
Click Edit on the Weather/Conditions card to access water quality sliders:
- Water Temperature: 0-100°F slider or direct input
- Visibility: Ranges from < 6" to >72" in 6" increments
- Severity: Very Mild → Mild → Moderate → Severe → Very Severe
- Alkalinity: 0-300 ppm slider or direct input
Drag sliders or type values directly. Labels update in real-time. Click Save when done.
Location Selector Sheet
For multi-location surveys:
- Select from customer's saved locations
- Use the "Import from..." dropdown to copy coordinates from previous jobs (requires internet)
- Or add new GPS coordinates manually
Each location can be associated with specific fish data and observations.
Note: Importing from past jobs and retrieving GPS coordinates may not work offline.
Advanced Features
Working Offline
Electrofishing often happens in remote areas without cellular service.
- Pre-Sync
- Offline Work
Prepare Before Going Offline
- Tap the Sync button before leaving
- Download job data, maps, and reference materials
- Verify all resources are cached locally
- Check battery and device storage
Continue Working Offline
Most features remain functional without cellular service:
- Enter fish data (from pre-synced species catalog)
- Record water conditions manually
- Add findings and recommendations
- Create new targets and recommendations
- Data saves securely to your device
- Auto-sync occurs when connection is restored
Offline Limitations
- Import from past jobs - Not available offline
- Fetch Weather - Requires internet connection
- GPS coordinates - May not work without connection
- New species - Cannot create new fish species offline (use catalog species only)
Activity Tab
Switch to the Activity tab to:
- View system logs: See history of all changes to the job
- Add notes: Record extra information or observations about the job
- Leave messages: Messages will visible to other users when you're back online
Useful for documenting unusual observations, species questions, or context that doesn't fit elsewhere.
When multiple people have the same job open, they will not see each other's messages in real-time. You can still refresh the Activity tab to load new messages from your teammates. It is not recommended to have multiple people work on the same job at once.
Job Messages
Type messages in the text box at the bottom of the Activity tab. These are saved with the job and visible to your team when they sync.
Messages are a great place to store internal notes and record additional information.
Once complete, your job data is ready for report generation. You can either go to the work tab and click the Generate Report button, or navigate to the Reports section and create a new report from your completed job.